
Table of Contents
Introduction: More Than Just a Groove
What Exactly is a Router Tool? Demystifying the Basics
Power and Performance: Choosing Between Fixed-Base and Plunge Routers
The Indispensable Duo: A Guide to Router Collets
Building Your Arsenal: A Curated List of Essential Router Bits
The 15-Point Mastery Checklist: From Novice to Expert
Safety First: The Non-Negotiable Rules of Router Operation
Real-World Project: Crafting a Custom Picture Frame
Maintaining Your Machine: Ensuring Longevity and Precision
Conclusion: Unlocking Your Creative Potential
Introduction: More Than Just a Groove
Imagine walking into a woodworker’s workshop and being asked which power tool they couldn’t live without. Most would probably answer after the table saw, but a select few might jump to the humble router tool. To the uninitiated, they might see a dusty old motor, running and inaudibly noisy. However, to sophisticated woodworkers, it is the tool responsible for a world of fine detail and professional finishes. It unlocks joinery and finishes that are otherwise unachievable; it is the tool that differentiates a simple box from a fine heirloom chest or an ordinary slab from an elegant table-top.
This guide aims to help you learn how to get the most out of one of the most valuable tools you will find in advanced woodworking. We are going to go from the basics to advanced tips to make the woodworking router one of your favorite tools.
What Exactly is a Router Tool? Demystifying the Basics
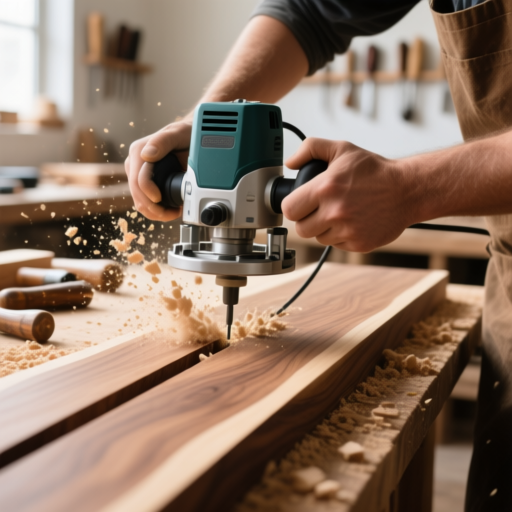
Simply put, a router is a high-speed electric motor that, with the help of a special cutting bit, can hollow out or carve out portions of the face of a piece of wood. The cutter spins extremely fast, going at a minimum of 20,000 revolutions per minute. The motor is housed in a frame with an adjustable post base that lets you control the cutting depth. Routers are one of the most versatile tools in any workshop. It can do the work of many hand tools, especially when mounted in a router table, and there is a wide variety of bits you can use, like those found in a fully stocked router hand tool library. There are endless possibilities with just one woodworking tool. To get to more advanced tips and options, you will first need to understand the basic principles of how this tool works.
Power and Performance: Choosing Between Fixed-Base and Plunge Routers
The first primary consideration when purchasing a router tool is deciding between the two main styles: fixed-base and plunge. This consideration is not simply a matter of personal preference; it determines which tool is best suited to the job.
Fixed-Base Router. Picture a motor sitting in a base, but instead of moving, it is secured at a certain height. This is what makes the fixed-base model. Fixed bases require the depth to be adjusted before the tool is turned on, and the base will remain locked at that depth for the entirety of the cut. This design provides exceptional stability and, because it is often lighter, is excellent for edge profiling (round-overs, chamfers, ogees). It is also great for use in a router table. For many standard applications, the fixed-base wood router offers the most consistency and control.
Plunge Router: This design has a router base that allows the motor to plunge into the work while the bit is running and is held up by a spring that is released when the cut is started. This kind of versatility can be a must-have feature for operations that begin in the middle of the board, such as mortises for joinery, inlaying, or the carving of a deep groove. When one is routing internal, non-linear cuts, that router is a plunge router.
For many woodworkers, the best mice are combo kits that come with one motor and two bases, one fixed and the other plunge, allowing them to take on any project they want.
The Indispensable Duo: A Guide to Router Collets
The little, often forgettable, and underappreciated part that holds the router bit shank in the motor’s spindle, and is wide, is the collet. It is an accuracy sleeve that, when compressed, applies a lot of pressure to keep the bit from moving. It is part of the correct collection, which is vital to safety and performance.
Sizing Matters: Shank sizes come in 1/4 inch and 1/2 inch sizes. Larger bits sharpen and cut better with 1/2 inch shanks. They pull less and grip better, resulting in less vibration and a smoother cut. Use the collet that fits your bit’s shank size exactly. If your router tool does not come with a reducer sleeve, do not attempt to use one.
Cleanliness is Key: Your collets need to be cleaned because they cannot grip properly, causing slips and, even worse, cracking in the tool.
Building Your Arsenal: A Curated List of Essential Router Bits
Along with the router, the bits are the sculptors of your work. To give yourself an advantage, use a high-quality router bit set and make these your priority:
Straight Bit: The workhorse. Use for grooving, rabbeting, and mortising. Have a few in different diameters.
Round-Over Bit: Gives any project a finished look by softening sharp edges.
Chamfer Bit: A beveled edge is helpful for decoration or to ease an edge that will be painted, preventing chipping.
Rabbeting Bit: Cuts a stepped shoulder on the edge of a board; necessary for joining pieces and fitting backs into cabinets. This type of bit is often sold with interchangeable bearing guides of different rabbet sizes.
Flush-Trim Bit: This bit features a pilot bearing on either the top or the bottom. This bit is essential for any of your veneer trimming or pattern-routing needs when you want to copy a template outline.
Dovetail Bit – This one is the most important one to get when you want to create the beautiful, intricate pattern joint – a masterpiece of fine furniture. This one requires both a router tool and a special jig to get nice, consistent results.
A high-quality, sharp bit and a dull, cheap one do have a tangible impact on the quality of your work with this power tool, so keep that in mind.
The 15-Point Mastery Checklist: From Novice to Expert
Getting good with a router tool is a journey, and a multi-step one at that. Use this 15-point checklist to build your router skills safely and bit by bit.
Know Your Machine – The first thing you need to do is read the manual. Before you plug it in, get to know what the on and off switches do, and how to lock and unlock the depth adjustment.
Secure Your Workpiece: You’ll NEVER route a piece of wood that is not firmly clamped. The forces you create can send a small piece of wood flying.
Choose the Right Bit: Match the specific task to the appropriate bit, and ensure the “shank” is clean and in good condition.
Set the Right Depth: Loosen the depth stop and adjust the base to take a shallow cut and then, for deeper cuts, make more than one pass.
Confirm the Bit Direction: This one is important. A router bit spins clockwise. This means you will want to feed the router left to right when routing the edge of a board. This will ensure the cutting action pulls the bit into the work, not out of it.
Put On Your Safety Gear: Make sure to wear safety glasses. It’s also a good idea to wear a dust mask, and hearing protection is recommended.
Use a Test Piece: Always test the setup on a piece of scrap wood to check both the depth and the quality of the cut.
Use a bit that is in Good Condition: A dull bit is dangerous, and more effort is required to use one. It also burns wood and can put a lot of strain on a wood router’s motor.
Try to Maintain a Controlled Feed Rate: If you feed the wood too fast, tear out can occur, and the motor can be strained. If you feed it too slowly, the wood can burn. Maintaining a steady pace is a good way to avoid both of these issues.
Use Guides and Fences: A router edge guide will help you achieve an accurate, clean edge on your work.
Understand Grain Direction: Routing tear-outs are more likely when cut against the grain. Always set up the machine so that cutting is routing with the grain of the work.
Master the Plunge: Plunge routers need to have clear workpieces below them and need to adjust motor heights slowly and evenly
Unplug for Bit Changes: This is also a straightforward yet fundamental router safety rule! Always unplug the router tool before changing a bit.
Keep the Base Clean: Smudge-free workpieces and a clean baseplate are a result of a clean base.
Practice, Practice, Practice: Confidence and speed come from lots of practice, and edge profiles are a reasonable consideration for a starting point to more complex work.
Safety First: The Non-Negotiable Rules of Router Operation
Clamp Everything: This is a safety rule circle for routers. A lack of securely fastened workpieces is the most significant cause of router accidents.
Mind the Cords: Be very careful when using power cords or hoses from a dust collector. You do not want to end up routing right through them.
No Loose Clothing: Things like ties, gloves, and long sleeves can get caught in the machine’s moving parts and should be avoided.
No One-Handed Operation: For every operation, use both hands to control the machine and keep a steady, even grip.
Real-World Project: Crafting a Custom Picture Frame
Theory meets practice in a warm-up project: a custom picture frame. This is a great use case for a fixed-base router.
What You Need
2″ wide poplar (stock for the frame)
A fixed-base router
A rabbeting bit
A decorative profile bit (a simple round-over or Roman ogee)
Clamps
Safety equipment
The Process
Cut the Frame Pieces: Four frame pieces to length with 45-degree mitered corners.
Route the Profile: Using the decorative bit in the router, edge profile the front edge of each frame piece. Remember to feed left-to-right and use a scrap piece to support the cut end to prevent delicate mitered-end blowout.
Rabbet Routing: Switch out to the rabbet bit. This one will cut a ledge along the back of the frame to accommodate the glass, picture, and backer. The rabbet bit is built to follow the edge of the profile from the previous cut, setting the rabbet width. The depth of cut your router tools create will determine the precision of the recess.
Finishing and Assembly: Use glue and clamps to hold the pieces together, and then sand your frame as needed. Choose your finish, let it dry, and your frame will be ready.
It is fantastic to see how much a single router tool can do to create the beauty and function of a piece for any project.
Maintaining Your Machine: Ensuring Longevity and Precision
A reliable partner is well-maintained. For a router tool, good maintenance is needed to keep good performance. Blow dust out of the motor vents and collect with compressed air after use. Check the motor brushes according to your router’s manual and replace them if they are worn. Lubricate the height-adjustment threads as described in the manual. Store your router and all of its bits in a dry case or drawer to keep the cutting edges safe. This simple maintenance will ensure your woodworking router lasts a long time.
Conclusion: Unlocking Your Creative Potential
It is router woodworking lessons that shine to the top. Instead of just building, you will be able to add those unique details that bring a design to a new level. It is a versatile and rewarding tool, but only after you have practiced enough to respect it. From effective cuts to improved joints, a router can make your work more professional. So with all you have learned from this lesson, start from cuts that go right to the edge or at an angle. From this, you will make your best design yet.
You may also read routertool.